Begin Glass Fusing

Begin Glass Fusing
We understand that knowing where to start with glass fusing can be difficult. It is very easy to create beautiful works of art with glass. Let us show you how.
What is fused glass?
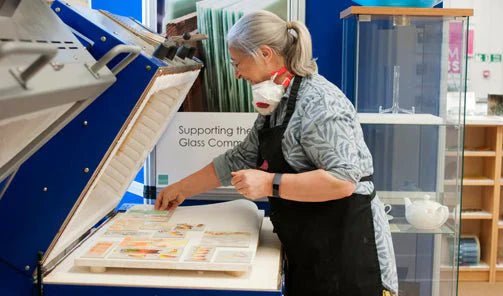
Fused glass (sometimes known as 'kiln-formed glass' or 'warm glass') is an artistic technique where clear and/or coloured glass is melted or fused in a kiln to produce a huge range of art pieces, from jewellery to bowls, sculptures, panels and ornaments.
Kiln-formed glass can be split into three basic techniques: Fusing, Slumping and Casting. Once these simple processes are mastered there is no limit to the creative potential of this amazing material. A wide variety of techniques have been developed by artists over the years offering endless inspiration to the new glass artist. We provide materials, advice and learning on all aspects of glass fusing. If it involves putting glass in a kiln, we can help!
 |
Glass Fusing - the technique of joining two or more pieces of glass by heat in a kiln. |
 |
Glass Slumping - to heat glass sufficiently so that it bends under its weight, taking the shape of the mould on which it rests. |
 |
Glass Casting - filling a mould with glass, then heating until the glass is molten. Hence, it fully takes the shape of the mould. |
What do I need to get started?
To get started you need glass, cutting tools and a kiln. We sell a Glass Fusing Starter Kit which has everything you need to set up a home studio except the kiln, but we can help you with that too. We sell the best quality glass kilns available and provide a lifetime of free advice on buying, setting up and using it.
Key Techniques:
There are three key skills to learn when beginning glass fusing: cutting glass, layering glass and firing glass in the kiln. These simple techniques are the basis for glass fusing success:
 |
Cutting Glass - Or should we say breaking glass? Cutting sheet glass rarely involves actual cutting. Instead, score along the face of the glass using a glass cutter (we recommend a Toyo to begin) then 'break' the glass along the score with breakers. It's easy to do with Bullseye's Improve Your Cutting Tipsheet. |
|
|
Layering glass - Glass acts differently in the kiln depending on its thickness. Remember the 6mm rule: glass likes to be 6mm thick on firing. Too thin and it will draw in and distort, too thick and it will spread out and flow. Keep the shape of your piece by layering to about 6mm before firing - commonly with two layers of 3mm glass, or three layers of 2mm glass. Layering also creates depth and interest in your work. See Bullseye's Heat and Glass Tipsheet for information. |
 |
Firing glass - Putting your glass in the kiln for the first time is an adventure. Firing schedules can seem daunting, but for fusing there are only two basic firing schedules you need: a tack fuse (where the glass sticks together but retains its texture) and a full fuse (where the glass melts together to give a smooth, glossy surface). For more information, see our Kiln Schedules page. For help on programming your kiln, see our Video Tutorials. |
Glass School is our dedicated online learning platform to take you on your learning journey, the Learn At Your Own Pace projects and courses are perfect for beginners and features a 'Beginners Fusing' course.
First Projects:
These three kits are each a great introduction to the art of glass fusing. They are easy and produce great results. They each come with all the glass you need and full instructions to complete the projects.
Building Skills - Introducing reactions, frit, powders and stringers
Once you have got to grips with the basics of fusing, try these projects to add new skills and learn more about working with accessory glass.
Taking Shape: Using different types of mould for slumping and casting
Now you are gaining confidence, try using moulds to shape your glass to create bowls, vases and cast glass pieces. Take a look at the moulds we offer, each one comes with its own instructions and firing schedule to get the best results. It's a good opportunity to play with your kiln controller. Remember, for slumping and drop out moulds you must fire your flat piece (usually to a full fuse) first before putting it back in the kiln on the mould to re-fire using the appropriate schedule.


