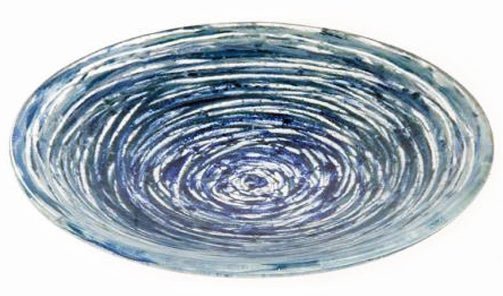
How To: Create a Whirlpool Bowl

How To: Create a Whirlpool Bowl
Glassline pens are used to create all of the colour in this project, resulting in a handmade, artistic feel.
You will need:
- Kiln and Kiln Shelf
- 2 x Bullseye Tekta (3mm) Circles
- 3 x Glassline Pens Mould
- Glass cleaner
- Paintbrush
- Cocktail Stick
- Bullseye Clear Glass Powder (1101.08)
- Powder Sifter
- Kiln Wash
Optional: Glassline Bubble Pens, Circle Cutter

To make a whirlpool bowl:
- Cut two circles of your preferred size out of 3mm Tekta (1100.38), or use 2 pre-cut Tekta circles of the same size.
- Choose three colours of Glassline pen in blue and white tones.
- Take the top off the bottle and blob the paint directly onto the glass.
- With a paint brush blend the colours in a circular motion.
- Leave to dry or use a hair dryer to speed it up.
- Once dry, use a cocktail stick to scratch a spiral pattern into the paint layer.
- Repeat this process for your second layer of glass.
- Once both pieces are ready sift a thin layer of Bullseye clear glass powder over each one.
- Place one piece on top of the other and fire to a full fuse (see schedule below).
- After firing, slump into your mould according to your mould instructions.
Full Fuse Firing Schedule (for glass 6mm thick):
| Segment | Rate (Degrees/hour) | Temperature | Hold |
| 1 | 222°C (400°F) | 677°C (1250°F) | 30 minutes |
| 2 | 333°C (600°F) | 804°C (1480°F) | 10 minutes |
| 3 | 999°C (AFAP) | 482°C (900°F) | 60 minutes |
| 4 | 83°C (150°F) | 371°C (700°F) | End |
Tips
- The clear glass powder sprinkled between the layers helps to prevent unwanted bubbles forming in the piece during firing.
- For variations try using Glassline Bubble Pens on the base layer or experiment with different colours.
- Slumping schedules vary according to the particular mould you are using. The slumping schedule is available on the product page for all the moulds we stock, on our website.

